5 tips to be happy with your glazing process
I hope you’re doing well!
This is the first post of the year. And this time, we’re diving into something a bit more “technical”: glazing. Let’s get into it.
When we talk about glazing, we first need to understand what porosity is.
Porosity refers to the ability of a solid material to absorb liquids, thanks to its microscopic pores. In the case of clay, this means that while it can hold water, it also absorbs it over time—expanding and contracting as it dries.
The risk of bacterial growth is the reason why ceramics intended for food use should not be porous.
Let’s talk about clay types. Red clay (low-fire clay) is particularly porous, making it extremely difficult to clean thoroughly. As a result, bacteria, mold and fungi can develop. Even if a piece looks clean, it may contain harmful toxins that can leach into food or liquids.
Stoneware and porcelain (also known as high-fire clays) are considered non-porous when fired to 1285ºC, as the clay particles “melt” and vitrify at this temperature, forming a glass-like surface.
However, if you fire your stoneware or porcelain at a lower temperature, then—just like earthenware—you must glaze your pieces for them to be functional.
Before diving into glazing, you might be wondering: are raku pieces functional?
Raku typically uses high-fire clay with grog to withstand thermal shock. But despite the clay body, the process itself is low-temperature firing, meaning the clay does not vitrify. In other words, it is not food-safe.
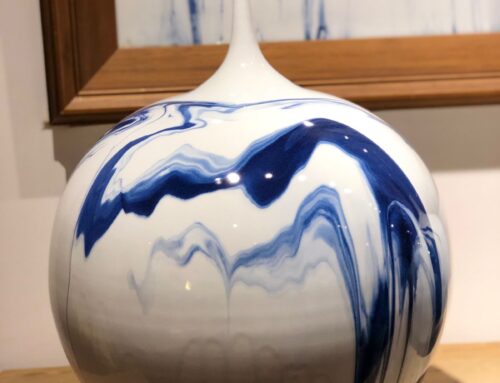
What about burnished ceramics?
Burnishing involves polishing the clay surface to create a smooth, shiny finish. It’s often used for decorative purposes. But to be food-safe, the piece must still be fired to 1285ºC. At lower temperatures, glazing is essential.
Now that we’ve cleared that up, let’s get to the point: glazing.
Here are our 5 tips to be happy with your glazing process.
1. Take your time
For me, this is the most important tip—and also the easiest to ignore when a deadline is approaching…
That “I’ll just glaze everything quickly” approach almost never works.
Give yourself time to go through each step calmly and consciously.
2. Prepare your pieces properly before glazing
Avoid handling your pieces with dirty hands or after applying hand cream.
Clean off any dust before glazing using a damp sponge. Oil or dust can act as a barrier, preventing the glaze from adhering properly and potentially causing it to run.
Sharp edges should be sanded before glazing. Don’t ignore this—once glazed, there’s no fixing it.
It’s best to develop the habit of checking this before the bisque firing, as it’s much easier to work on edges at leather-hard stage.
3. Let your pieces dry before firing
Allow your pieces to dry overnight before putting them in the kiln.
Water and kilns are not a good combination.
If the piece is still damp, the steam released as temperature rises can cause issues such as bubbling or glaze running.
Again: rushing is not a good idea.
4. Test. Then test again. And again.
Did I mention testing?
Do not use glazes you haven’t tested before—especially not on pieces you care about.
I know it’s tempting. You have a beautiful piece and imagine an amazing glaze combination…
Read that again: in your head.
Glazes can behave completely differently depending on:
- the number of layers applied
- the shape of the piece
- inside vs. outside surfaces
- the texture (smooth vs. stamped vs. heavily textured)
- the clay body (different clays can react differently due to their metal content)
Mixing glazes? It probably won’t turn out the way you expect. The color wheel doesn’t apply here—glaze color is a chemical reaction.
If you use oxides under the glaze, you also need to test—the result can vary depending on the oxide.
And don’t forget kiln placement. If your glaze responds to cooling, its position in the kiln can completely change the result.
5. Precision, consistency and repetition
Applying glaze is only one part of the process.
Many other factors need to be controlled if you want consistent results.
Bisque firing temperature:
This affects porosity, and each clay body responds differently. The more porous the piece, the more glaze it absorbs.
There’s no single “correct” bisque temperature—but keeping yours consistent will make results easier to control.
Glaze preparation:
Some ingredients tend to form clumps, even when finely ground.
A high-speed blender is a great way to mix glazes without sieving—it breaks up small clumps more effectively than slower methods.
This can significantly change how materials behave and therefore the final result.
The best way to manage this?
Always do it the same way.
Whether you use a blender or not—be consistent.
Well, that was longer than usual—but worth it, right? We have 2 workshops about glazes – here the link if you’d like to know more. See you soon?
A hug,
Paula