 The Good, the Bad and the Ugly of Ceramic Firing Methods
Hello! I hope you’re well.
We’re back with more informative posts, and this time we’re exploring different ceramic firing methods. We’ll look at some of the most common ones, including the good, the bad and the ugly of each.
When discussing firing methods, we often talk about oxidation and reduction.
These are two different firing atmospheres, and the same glaze can look very different depending on which one it is fired in.
Oxidation occurs when there is sufficient oxygen in the kiln. During firing, oxygen reacts with components in the clay body and glaze, influencing their colour and appearance.
Reduction occurs when the supply of oxygen is limited during combustion. Gases such as carbon monoxide draw oxygen from metal oxides in the clay body and glazes, changing their chemical state. This can affect the colour and appearance of the finished surface.
So, let’s explore the good, the bad and the ugly of each firing method.
Electric Kilns
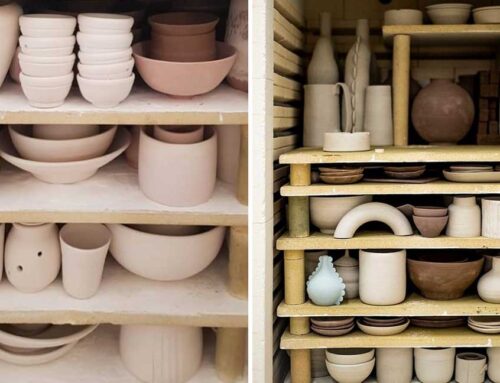
The good: Electric kilns are among the most widely used kilns by potters today. They are relatively straightforward to install and easy to operate, with most modern models featuring digital controllers. They are typically built from insulating firebricks, with grooves that hold the heating elements.
The bad: Standard electric kilns are designed for oxidation firing. Reduction atmospheres and burning combustible materials inside them can damage the heating elements.
The ugly: The electricity bills… certainly something to consider!
Gas Kilns
The good: Gas kilns use combustion to generate heat and can fire to high temperatures. They allow potters to work in reduction, producing distinctive colours and glaze effects that are difficult to achieve in a standard electric kiln.
The bad: They require careful control of the fuel supply, airflow and kiln atmosphere. Uneven heating or poorly controlled firing can lead to inconsistent results and defects.
The ugly: Installing a gas kiln in a city can be challenging because of ventilation, flue and permit requirements. If you have a rural studio, there may be more scope to explore reduction firing, provided the installation meets the relevant requirements.
Wood-Fired Kilns
The good: Wood firing is an ancient practice that uses burning wood to heat the kiln chamber. Many potters build their own wood-fired kilns. The flame and wood ash can leave distinctive marks and surface effects, making each firing unique.
The bad: Wood firing requires constant attention. With an electric kiln, you can programme the controller and let it follow the firing schedule. A wood-fired kiln needs regular stoking and monitoring to maintain the fire and the desired temperature. Some firings can last up to three days, depending on the kiln and the results you want to achieve.
The ugly: Uneven heating, ash deposits and the demanding conditions inside the kiln can cause cracking, distortion or pieces sticking to kiln shelves—or to one another.
Raku
The good: In the Western raku process described here, pieces are removed from the kiln while still glowing hot. They are then placed in a container with combustible material, such as paper or sawdust. As this burns, it creates a reduction atmosphere around the pieces.
Depending on the glaze and the process, this can produce beautiful crackle patterns, smoky surfaces and metallic effects. You can use a purpose-built raku kiln or a suitably designed kiln made from materials such as firebricks or an insulated metal drum.
The bad: Raku is generally a low-temperature process, so the clay body remains porous. The rapid temperature changes can also cause cracks. Pieces made using this process are generally intended for decorative use rather than functional tableware.
The ugly: The intense heat when opening the kiln and handling glowing pieces. There is a significant risk of burns, so appropriate protective equipment, long tongs and careful handling are essential.
Pit Firing
The good: Pit firing is one of the oldest approaches to firing clay. It is still used today for the distinctive colours and surface markings that fire and smoke can create.
It does not require a conventional kiln: instead, the pieces are placed in a pit with combustible materials such as wood, sawdust and leaves.
A layer of fuel is placed at the bottom, followed by the ceramic pieces, with space between them. More combustible material is added around and above the pieces, and the fire is lit.
The way the fuel burns and the amount of oxygen available influence the results. Some methods involve covering the embers to restrict airflow and create reducing conditions. Once the firing is complete, the pieces are left to cool fully before being carefully removed, cleaned and, if desired, finished with wax.
The bad: Pit firing generally reaches relatively low temperatures. Although the clay becomes ceramic, the pieces usually remain porous and less durable than high-fired ware.
The ugly: Open flames, heat and smoke require care. Wear appropriate protective equipment, keep a safe distance from the fire and ensure nobody is standing downwind. Depending on the materials used, the smoke may contain harmful substances.
Understand Your Kiln—and Your Results
As we’re based in the city, we work exclusively with electric kilns. And because they are such a common tool in ceramic studios, we’ve developed a masterclass to help you understand how electric kilns, clay bodies and glazes work together during firing.
We’ll explore kiln operation and maintenance, firing schedules, loading principles and glaze behavior, helping you make more informed decisions and better understand your results.
You’ll find all the details here.
The masterclass is taught by Muriel Dumahut, ceramic artist and teacher.
Warm wishes,
Paula